Tuesday 14 December 2010

Day 9

I'm hanging in there... Almost!!

For my Day 9 layout I kind of cheated a little bit. The photo's were actually taken on the eighth, but I really wanted Day 8 to be about Danny starting his Christmas holiday. We did go shopping on day 9 (not to the mall in the pics though :/ ) and the Starbucks cup is from the ninth... so all in all not too much cheating... I think?

Day 9
I know a lot of people are using their Starbucks packaging in their layouts... and yes I guess I'm jumping on the bandwagon... But when the seasons coffee's start being sold, it is one of the huge signs for me that Christmas is getting near. I've had a number of gingerbread latte's from other coffee sellers over the last few weeks, but this day was the first time we went to Starbucks (non of the others did festive cups... Shame on you all! lol) I really liked the cup design and couldn't decided which side to show, so I went with a double page layout and cut the cup down the middle. I quite like the way it worked out :D

If anyone's interested, I had the Eggnog latte and Danny had the Peppermint Mocha :9

Page 1
Don't know if you can see, but I cut the number 9 out of the cup sleeve. It's not perfect I know, but I kinda liked the shabby look to it... Also if you look closely, I did my journaling by writing directly onto the cup. It's more obvious in some areas than others.

Page 2
I decided to use black paper as a background as I felt it really made the cup design stand out. I wrote all the names from our shopping list on the background paper in metallic silver. Some you can read, the majority are hidden. I was thinking of using my real list as a background, but that also documents what each person will receive. For that reason I decided not to put it  on this page... although, I might still use it at a later date and maybe keep it hidden in an envelope or something...? We'll see!

Well that's all for now... 10, 11, 12 & 13 next :/

Sunday 12 December 2010

Days 6, 7 & 8

Oh NOOOOO! I'm falling behind :/

Today I've been desperately trying to get back on track! The past week we've been suffering with colds, not really bad colds... just the ones that are just lurking enough to make you want to sit around doing nothing... maybe that's just me??

Well anyway... instead of doing my DD when the kids are tucked up in bed, I've been crashing on the sofa, too tired to do anything!

Although I hadn't physically done the layouts, I'd done most of the work in my head... just needed to put it onto paper!

Finally... Here is Day 6, 7 & 8 for your viewing pleasure :D

Day 6
Most of my previous pages were quite photo orientated, but these ones were more about the story of the day. As I mentioned above, I've had a cold the past week, as have my kids... All good fun! :/ My story for Day 6 was about us all sitting to watch Elf. Was really great, the kids really enjoyed it, we all had a good laugh :D
Page 1
I used a candy cane stamp as my boarder, stamped in black and then coloured in with gel pens... not sure why candy canes.... maybe it was to do with the candy cane forest?? I tried out my festive papers, but nothing was working, so here we are! I like it anyhow! As I was doing the stamping I realised the canes actually looked rather like little number sixes... So I ended up drawing out a candy cane number six :D

Page 2
Page 2 shows my feeble attempts at  capturing the three of us snuggled under our blanket watching the movie... Poor Wiyot, just couldn't seem to get his head in the pic :/ We had a laugh trying though, which is why I wanted to include them in my page. Shoshone sat there saying "CHEEEEEESSSEEEE" the whole time I was taking the pics! lol

Day 7 & 8
Decided to keep days 7 & 8 to a page each. Day 7 was fairly slow and so was struggling to fill a two page spread.

Day 7
Managed to capture this rare scene and had to put it in my DD. Shoshone was following Wiyot around and giving him big cuddles. They were loving it, as you can see in their faces :D The boarder is a stamp from the same set as the candy canes. I used two different inks, trying to get a similar colour to the green in the glass tile. The tile came from a Christmas card Danny gave me 6 years ago (I knew it would come in useful one day!!)

Day 8
And finally Day 8! Danny's Christmas holiday begins!! Woo Hoo!

We opened a jar of champagne to celebrate... champagne and strawberry jam! Very nice too with our lovely fresh, warm croissants :9

Few mistakes on this page... I can't be bothered to do the whole page again, so will just have to live with them!

OK... I'm almost caught up! Now on to 9, 10, 11 & 12!!!! ARRRRGGHHH!!! 

Tuesday 7 December 2010

Day 4 & 5

I consider myself to be a full time mom...

I'm with the kids 6 days a week, day 7 (Sunday, the day of rest!) I work and DH takes over while I'm away. 

This week I was lucky enough to get to work both Saturday and Sunday! I don't mind as I absolutely love my job, especially at this time of year. However, it didn't leave me many options for the days pages.

Day 4 & 5
The photo's were actually taken the other way round, the store photo on the 5th and the Santa one on the 4th, due to the perspective of the two images, I chose to put them the other way around.

Both of the images were cropped in Photoshop and the journaling added. I used free fonts available on dafont.com The text font is Honey Script and the number is from the Christmas/Flakes font. 


The Front of our store
This is a photo of the front of our store taken before we opened on Sunday. I don't know how, but somehow I failed to notice the person walking past till I came to work on my pages... Doh! The journaling at the top is part of the phone greeting that we all say at this time of year :)

Some of the centre's Christmas decorations
As I mentioned above, this was actually taken on Saturday after I finished for the day. The Christmas decorations have been up since early November, but this was the first time I have walked to the other end of the centre to see Santa. I was hoping to squeeze in a bit of Christmas shopping, unfortunately the store I was in decided it was closing time and turned the lights off on me :(

Oh well, I'm sure we'll fit in a bit of shopping over the next couple of weeks while DH is off work... At least I hope we will as we've hardly done any yet!

Also managed to get some knitting done this weekend. With the weather we have had in the past week, the roads have been rather icy, meaning no petrol has been delivered to the local stations. To save fuel I decided to catch the bus to work this week. This means double the amount of travel time, BOO! But on the plus side it is a great time to do a spot of knitting :D Saturday was great, got quite a bit done. Sunday I forgot to take an extra ball of yarn, I had nothing to do after a couple of rows, resulting in 1 1/2 hours sitting doing nothing...  Major gutted!! I actually considered buying more yarn on my lunch! lol! The roads aren't much better so far this week... in fact our street is possibly worse! So maybe I'll be knitting on the bus again next week?! :)

Sunday 5 December 2010

Day 3

Been at work all day today, so haven't quite finished day 3 yet... but its almost there. I'm really pleased with the way its looking so far, and so I decided to post it anyway :D

Day 3
Page 1
Page 2
I was hoping to follow just one story per day, but both these stories needed telling today! Page one you can already read the journaling for, but basically icicles are fairly rare where I live... in fact the amount of snow that we currently have is pretty much unheard of! I personally have never seen so much snow in my life, which is why it has featured in my DD for the past few days!

The second page is telling the story of our advent calendar. No my children haven't been wearing the same clothes for the past three days. Rather, I only just got round to getting the thing out :/ Don't worry, the kids have their own calendars that they received first thing Wednesday morning! This one is the family one that we have had for the last 5+ years. I was just waiting for the chance to clear some space on the fireplace to get it out... So today the kids got to open 3 doors all in one go!! Wiyot's done it all before obviously, but Shoshone wouldn't remember it from last year, so she was very curious, attempting to get all the little doors open to see what was inside :) I couldn't choose just one picture, so I went for a collage of their discoveries. Some of the pictures were blurry, but I didn't really mind as they are printed quite small and I loved them regardless!

I also wanted to share this:

December Daily's temporary home
I've had this tin lurking around for a couple of years now... No use for it, but still I didn't want to throw it out (I am currently working on my "trash muscle"). I am terrible for holding onto things that I feel one day may serve a purpose. It doesn't help that I usually end up right, even if it is way later! Well, once again my inability to throw things out has proved useful, in that I have found a home for my pages while they are being constructed.

Perfect fit!

 As you can see, its almost as if it was designed for this purpose!

*sigh*

If only it said something more festive on the lid... like Christmas 2010! lol


Friday 3 December 2010

December Daily Day 2

After a little bit of thought I've added the text for the day...

Day 2!
To see closer images of the individual pages, although before I added the text, go to my Day 1 post.

If anyone is wondering why I am leaving a larger boarder towards the inside of the pages, it's basically because I haven't decided how to bind the pages together yet. One of my options is to use my Bind-it-All, if I do use this I don't want the pictures or text getting punched in the machine. So for now at least, I am laying it out assuming I am using my B-it-A... hope that made sense?!

Now, on to day 3!!

December Daily Day 1

I know, it's the third now, but I had a number of technical difficulties in the printing of the photos and also a bit of indecisiveness in the layout! But anyway, it's done now... Almost!

The two page spread! The second page looks like its missing something to me...
Not sure what yet, but something maybe added!

Got carried away with the number of images I wanted to use. Originally I had planned to only use 1 or 2 images each day and also only do one page per day. However, once I got started, there was no way that was going to be enough!

So now I have a double page layout going on. Whether it will stay this way throughout... Well I guess we will see!

Page one.
I like the idea of this being a form of diary, so wanted to use note paper to do my journaling.

Page 2
This is the one I feel needs work... TBC?
And a peek at day 2... 

Again with the note paper... Not sure what to write though!
Page 1
Nice wintery pictures :)
Page 2
More snow... And a recycled No2!


 Well that's all for now...

Time to think what to write!


Tuesday 30 November 2010

Looking forward to tomorrow!

December tomorrow!!

I'm so excited for Christmas this year. It is Shoshone's second Christmas, but her first where she will have any kind of interest, and Wiyot is at now at the age where he really know's what's going on. He's currently working on his handwriting so that he can do his letter to Santa :D

I can't wait to watch Christmas movies with them this year, decorate the house, play in the snow, go Christmas shopping, see family and friends... And I really can't wait to start logging it all in my December Daily! I'm actually contemplating extending it on to 1st January as my family usually come over for New Years Eve. The following day is the end of the Christmas period for us, so seems appropriate to end the book then... I'll have to see how I get on with the other days first though! 

On the same subject, I still haven't got the printer problem sorted out, so will be a work in progress thing! I got a few ideas of how to get round it though... As for the bindings, I'm just going to leave it till its finished and can see how big it is! The same goes for the cover.

I started knitting a little cardigan for Shoshone on Sunday. I bought the yarn after finishing the red hooded jacket the other week, but have only just started knitting with it :/

It's a pattern from the same book and is like a little bolero style cardigan. For the first time I bought the Debbie Bliss yarn as specified in the pattern, but in a different shade. I usually buy something cheeper as the Debbie Bliss ones are so expensive. For this pattern I needed 4 balls of yarn, costing just under £20...

I could buy I cardigan for that much!!! (I'm a cheep skate I know!) 

But I figured I could do it as a kind of Christmas gift for her and I really wanted to try using the DB yarn as it is so beautifully soft! 

Being rather pricey, thought I'd make the most of the experience :D
Well best go get knitting... especially if I'm going to finish it in time :/

Sending DH into the loft in later to retrieve the advent calendars :D

Roll on December!!!

Tuesday 23 November 2010

Hmmm....

So for the last few days I've been kind of working on my December Daily. It was going quite well, I'd decided upon a page layout, chosen some fonts that I liked, cut my pages to size...

But today it all seems to have gone wrong >:(

I got all ready to print my layout, only to find that apparently my printer doesn't like printing on card. Humph!

Looks like I'll be thinking up a new layout now... Unless DH can coax the printer into doing what I want!

My other conundrum is how to bind the thing when its done. Seems a lot of people use book rings as the completed project is rather large. However, everywhere seems to be out of stock though at the moment :/ Another option would be to use my Bind-It-All but I'm not sure they do wires big enough for the completed project...

So for now at least, my December Daily consists of 25 sheets of unpunched card.... Woohoo!

Sunday 21 November 2010

December Daily!

OK so I'm gonna make a post so that I can't back out!!

I've been having a nose around on other peoples blogs, and noticed that some of the scrapbookers out there are doing whats called a December Daily. For anyone not in the know, like me a couple of days ago, its exactly what the name suggests; a scrapbook where a page is done each day leading up to Christmas Day. You can read about it in more depth at Ali Edwards site.

Well as I've looked into it I'm feeling very inspired to do my own. I like the idea of each page being based around the same layout. So today I've spent some time working on my template. It's not finished yet, but I think I've decided on what I'm going to do. Then I just need to cut the pages to size, print them out and make the cover. Also at some point I'll need to figure out a way to bind it all together :/ Oh well there's time to worry about that later!

Well, thats all for now.

TTFN

Friday 19 November 2010

Day 2 Dolly

So after my practice run with Eve the Sarubobo plush, I decided I wanted to do a more challenging dolly to give to my nan. 

Having perused Mochi's blog the day before, I was quite inspired to attempt one of the other little dolly type characters that she made. Luckily she mentioned that the doll was a bunka doll, giving me something to search for when looking for a pattern. Patterns were pretty hard to locate, but eventually I found this one... it's in Japanese, but the pictures were clear enough for me to figure it out.

Result...

Named Eva by Wiyot 
The dress and hat were made with bits left over from an apron I made my nan last year using fabric by Tanya Whelan. The shoes were from an old bed sheet my mom gave me to practice with, and the rest was scraps of muslin.

Off for a ride
This doll and the Sarubobo were pretty small, easily made with fabric scraps.... Finally something to do with all those bits I've been holding onto!

Thursday 18 November 2010

I should really be in bed right now!!

It's 4:45 am and I'm up doing a blog.... Oh dear :/

Well I just really wanted to share my latest creation.

I'm naming her Eve... well because she's my first one! :)
 It's my nan's birthday on Friday and generally my grandparents prefer it if we don't buy them anything. I hate not giving them anything though, so for the last couple of years I've tried to make things when I can. A mini scrapbook, an apron, etc...

This year the plan was to either do some form of embroidery and put it in a frame that she could then use for a photo, or to make one of these bowls/boxes. I found the link some time last year when someone from the sewing forum shared it. However, only when I came back to find the link did I look at the other projects on the blog... I was there for quite some time looking at all the cute little things my little mochi has made! I particularly liked this little one and decided that this might be a nice little gift for my nan.

Lucky for me, this post had a link to a great tutorial by mairuru.

As you can see the tutorial worked perfectly, so simple to make and fairly quick! After I'd finished the Sarubobo tutorial, I figured I may as well try and add a little face...

I don't know about anyone else, but I think she's cute!
Having not embroidered anything like this before, I'm pretty pleased with the result! It's not perfect but is only a practice run. As you can see I then got a little carried away, crocheting her a little scarf and attmpting to make little hands (one's a little bigger than the other, but who's measuring! lol)

Well, better be off to bed. Tomorrow I'm making the real one... as in the one for my nan :)

Wednesday 17 November 2010

Little Red Riding Hood

I have been working on this knitted hooded jacket for some time now and have been planning it since before Shoshone was born. Well, last night I finally got it finished... although I should probably say "this morning," as it was 4am!

Finished cardigan, with a button from my nan's button stash :)
As soon as I saw this pattern in Simply Baby by Debbie Bliss, I knew I wanted to make it for any potential future daughter... At the time Wiyot was a baby and there were no immediate plans for baby number 2!

Fast forward a year or two... or three? and I began looking for the yarn to make this jacket. Although the picture in the book was really nice, for me this pattern was screaming to be made in RED! After a bit of a hunt I found a suitable aran weight yarn in my local craft store. They had just 3 balls left, lucky for me that was just the amount I needed :D

I quite enjoyed knitting this project, as it was made slightly different to cardigans that I've made previous. In my past knits the two front pieces, the back and the sleeves are all worked separately and then seamed together at the end. However, for this one you start by doing the bits individually and then join them together when you get the the under arms and work the yoke all in one piece. It doesn't seem that weird now, but when I first read the pattern I was quite surprised.

The biggest challenge the pattern posed was the seam joining the hood to the neck. Luckily I had my new found sewing skills to call on, else I think I would have really struggled easing in all the fullness of the hood... especially since there were no instructions as to how to do this in the book :/ Not sure what the usual method of doing this would be in knitting, but I basically ran a line of stitches through the hood, gathered it, matched up the centre hood to the centre back and then did my best at joining the two together... Seams to have worked ok (pun intended!)

The seam where the hood joins the back of the jacket
When I first began knitting I hated it when all the knitting was done and I had to start joining all the pieces together, I found it a real chore and frequently abandoned the project at this point to begin knitting something else... very sad I know! Now I actually enjoy doing the seams and am getting much better at them... and quicker! Think they turned out pretty well on this one, fairly invisible in most places. Still not quite happy with the one along the top of the hood though. It turned out better than the one on the poncho, but still not as invisible as I would like... Any tips would be gratefully received!

The seam along the left side of the jacket, along the arm and in the underarm area
The hood seam, can see the depression when the two sides are joined and there is a bit of bulkiness on the inside
Well now the little red hooded jacket is done, so I guess it's time for my mom to start looking out for the wolves... and not the Wolverhampton Wanderer kind she usually watches!

Shoshone with her favourite book


Monday 15 November 2010

Sewing / crafting spot!

HEEELLLLOOOO!!!!

Is anyone still there??? 

Ok, so its been a while... well ok, its been AGES! But I'm back now and hopefully will be able to keep up this blogging stuff more regular!

So, although I've not posted anything, I've still been making stuff... Superhero costumes, cards, cardigans, a dress, various alterations and quite possibly other stuff that I can't think of right now!

This post is not concerning one of those makes, rather the birth of my new crafty corner :D 

It's not called that... at least I don't think it is? It's just a corner of our living room that I have decided to use for my hobbies. It's not done yet, just put my sewing machine on the sideboard and declared it to be mine! I'm hoping that in time it will be a beautiful workspace, inspirational yet practical, something comparable to spaces I've seen on other blogs and in magazines... just google "craft room ideas" and you'll get the impression of what I'm after. Here is a link to a blog, with many different tips and ideas, check out the link at the bottom of the page to "Beautiful Craft Rooms." I love Connies Idea of desplaying her scrapbook layouts...

I seriously doubt my space will be anywhere near as elaborate as these, for one it still has to fit in with our lounge... but still some lovely ideas. I especially love the look of all the ribbons on rods, the colourful yarns and threads in storage jars and all the pretty folded fabrics waiting to be used... Ah just dreaming of my potential future workspace is making me feel creative! 

Well I'm off now, but hopefully will be back soon to share some of my 2010 makes...

TTFN x

Saturday 3 April 2010

Crystal Ball

Since I've been blogging I've been hearing the call of future projects...

I confessed on my last post that I shop on QVC, generally I try to stay away as I usually end up buying something if I watch a show or browse their site... especially if its related to paper craft, candles or household helpers. So I haven't gone near QVC for some time... Until a few weeks ago I got a email from them, can't remember what about, but I had a lapse in judgement and linked to the site. Well I am now the proud owner of a lovely set of scrapbook papers!


They will be perfect for my Shoshone scrapbook... if and when I get round to it! I also got a set of tools, but didn't take a pic of those... Included a all in one anywhere hole punch and setting tool (plus a mini craft mat and storage tin), a edge distresser, sand paper, a piercing tool and a photo album almost of ideas.

Another future project was recently forced upon me... Tragic I know!

I currently have two knitting bags... I made one from a pair of trousers that no longer fitted and the zip had broken making them unsuitable for the charity bag. That one currently provides a home to my yarn, needles and projects that are not currently in use. When I returned to work after my maternity leave I decided the trouser bag was too big to take on the bus so went back to my old knitting bag, which is just an old paper gift bag... It had been doing pretty well really, going strong for probably 4 years now, until a recent trip to the in-laws. As usual I'd been knitting as we drove to Wolverhampton, I got out of the car, picked up my bag and my knitting hit the drive having fallen through the bottom of the bag :-(

I now had two options...
  1. Replace the bag with another gift bag of equal size (I'd just received a fab one from my friend Jen, red with white polka dots, proper Minnie Mouse bag!!)
  2. Make a new one :-D
This one is to be a bus and work friendly knitting bag. Preferably waterproof, so doesn't get itself or my current project ruined on a rainy day or wet floor of bus, and also of a smallish size so can fit in my locker at work (promise I'll use my lock Jen! xx). So have decided to make the bag out of oilcloth... never worked with it before, but hopefully will turn out ok! Inspired by option 1 above, this is the fabric I have purchased :-)


Now I just need to come up with a pattern and hopefully have the heart to cut into my new gorgeous fabric!

Tuesday 30 March 2010

2 rolls of duct tape, cling film and a half naked lady...

I'm guessing that everyone that attempts making their own clothes, soon realises a dressform would really come in handy. However, as a newbie, I'm not sure I want to fork out for a pretty expensive piece of equipment that I may or may not use. Plus it most definitely won't be the exact measurements I need it to be... I can rarely find clothes to find my shape, what're the chances of finding a dressform?

Well as soon as I got interested in sewing I subscribed to a magazine called "Sew." Coincidentally, it came out at exactly the same time as my (renewed) interest and was aimed at beginners... perfect! Anyway, think it was maybe the forth issue? there was an article by a dressmaker who recommended making your own dressform out of an old t-shirt and some duct tape!

Cool, looked like a good idea! But then I forgot about it...

A few months later I was looking at the sewing forum and again came across the idea of a duct tape dressform, except this time using cling film and with more detailed instructions from someone who had tried it.

Again cool, but again I forgot about it... but not for long!

Think it was a few weeks later I was reading another blog and again the diy dressform was mentioned. Well I can take a hint you know, so I sent Danny off to the DIY to get some duct tape (I also called my parents to get them to save their old newspapers...)

The weekend just gone we finally got around to taping me up, lol!

I striped down to me undies and Danny wrapped me up in cling film. Easy! Although I probably shouldn't have stuffed myself silly on pasta before starting... Belly was a little rounder than normal... What can I say, I love carbonara :-9

Once cling wrapped, we began the lengthy process of taping me up! I knew it was going to take a while, but somehow I convinced myself that Danny and I would be naturals and be able to get it done super fast! I was wrong... well I think... I don't actually know how long it takes anyone else, so for all I know maybe we were pretty quick! It took us around 3 hours, plus extra time for coffee and cake :-)

Not too bad I guess, except we didn't start till gone midnight...

We did 3 layers in all, I've since seen recommendations for 6-7 layers, would definitely make the finished shell more sturdy, but there was no way I could have stood around for all that time. Once the cling film was on I didn't want to move as it came off so easy, then when the first layer of tape was on I couldn't move even if I wanted to... I could do a pretty good robot walk and hold the tape for Danny, but that was about it. As you can probably imagine, 3 hours of hardly moving = a very achy Michelle!

For anyone that's interested we did 3 layers first taping horizontally, next vertical and finishing with another horizontal layer. The different directions help to stabilise the tape. We used 1 and a bit rolls of B&Q multipurpose gaffer tape (50mm x 50m), the kind with the threads running through it to help stop any stretching and distortion. The tape was cut at varying lengths depending on the area being taped, longer pieces for the larger curves and flatter areas (thighs, stomach, back, etc) and much smaller ones for tighter curves (shoulders, neck, waist, etc). The breast area is very tricky, we tried to do a kind of cross your heart thing, but it didn't work at all. So we cut it down the length to make short narrow strips, the key is to not stretch the tape as you put it on else you flatten out the bust, rather than getting the true breast shape. Incidentally, for the torso I tried to always inflate my chest when I was being taped, didn't want Danny to have to cut me out too soon due to me not being able to breathe!

So here's how it looked before we cut me out :-)


Pretty good I think, quite tempting to sew a zip up the back and wear it as a dress, although I'd probably have trouble sitting down and would definitely want it longer :-S

I decided to make some kind of tube to fit inside that I can fit over my Hangaway (when not in use!) Here is my hangaway cover... (yes I confess, I shop at QVC!)


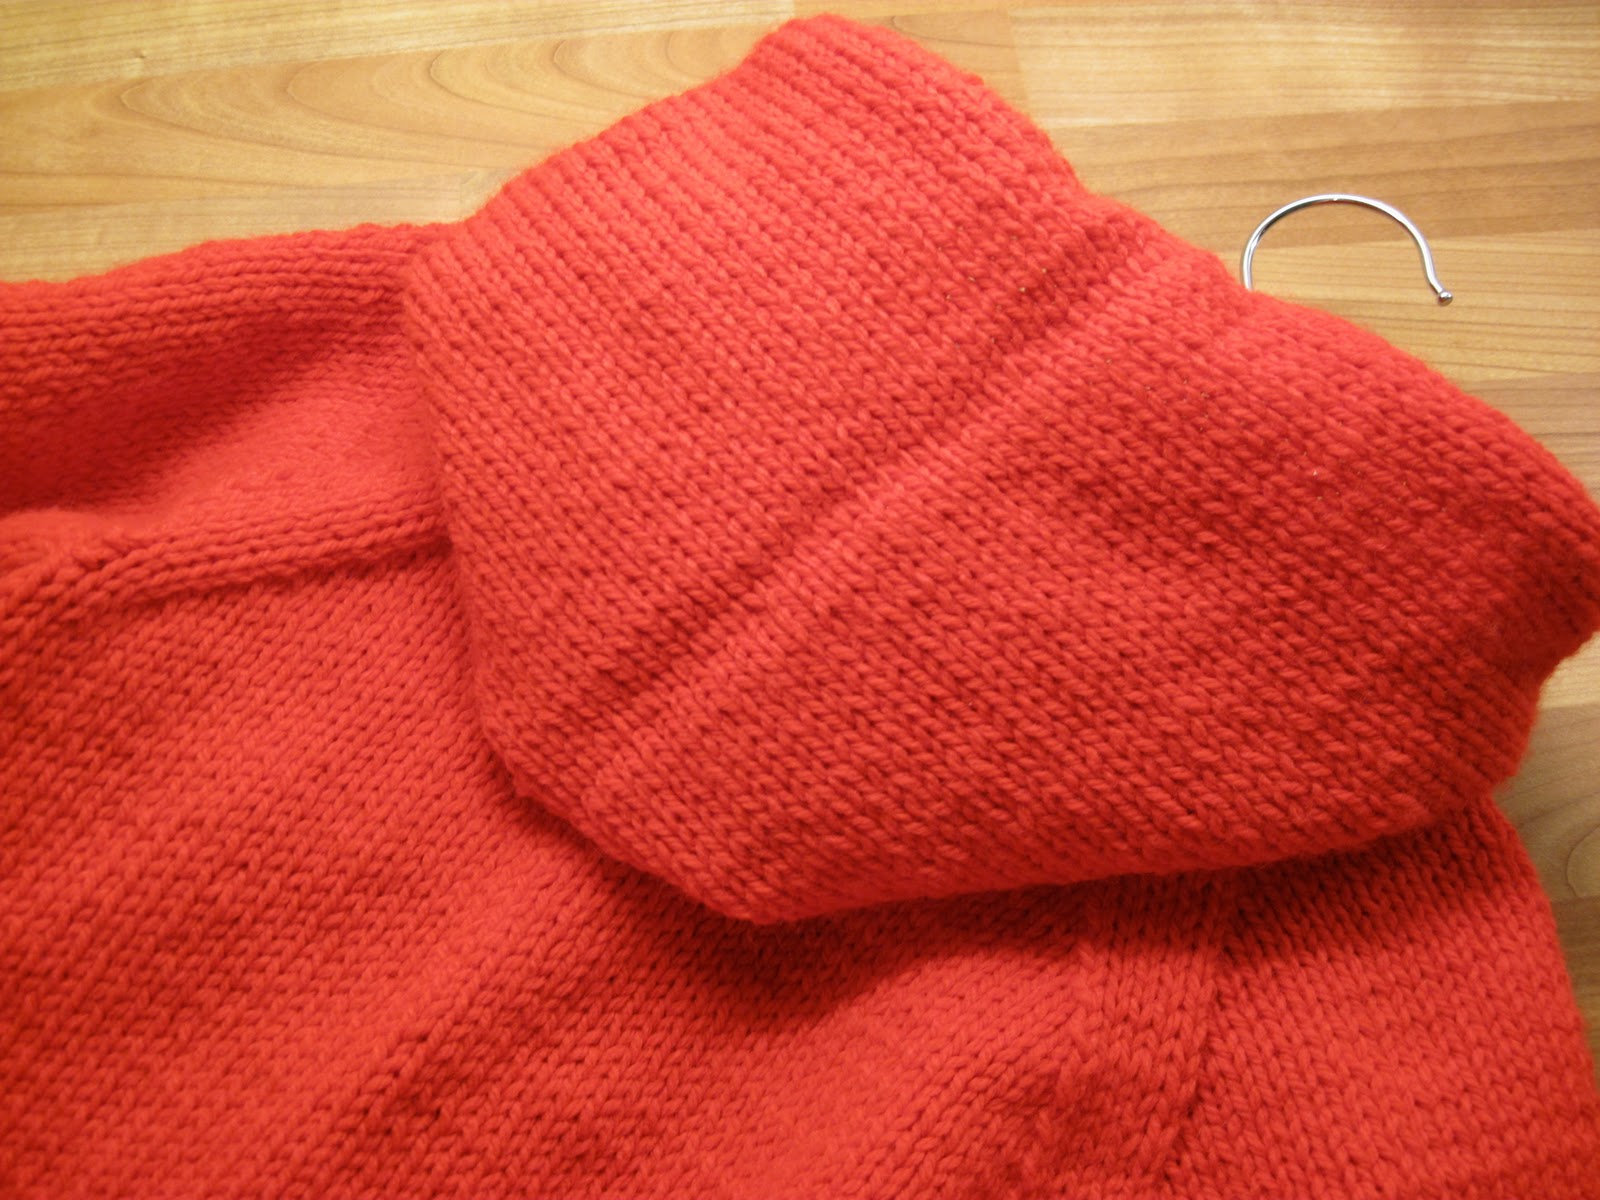
 And here is my completed dressform!


Not bad I think :-) Filling it was pretty tricky. I used old newspaper (thanks Mom & Dad!) and stuffed through the various available orifices... thankfully I hadn't sealed them up as I had planned to! The tube in the middle helped it to keep its shape, rather than going a rounded shape. I also added some card board at the shoulder to support the shape as well as pieces above and below the breasts and a piece on the back. If you're wondering how much newspaper, I used 4... 1 for the torso and 3 for the bum! lol! Oh and I also put a hanger in the top so that I can hang it if I need to and also to again support the shoulders when its got whatever fabrics hanging on it.

So that's about it, I've decided to leave the holes open for the time being. Ready for further filling should the need arise, although I have put a few pieces of tape over the base to stop the paper falling out!

Tuesday 16 March 2010

10 CLOVES OF GARLIC??? Now that's my kind of recipe!!!!! :-D

So for my birthday a few weeks ago, DH bought me the latest Jamie Oliver book, Jamie's America. Unfortunately, my birthday coincided with a bout of stomach flu, from which I'm still kind of recovering from. That said, understandably it took me a while to even look at the pics in the book, let alone feel the urge to cook any...

When I did start to feel better I grabbed my new book and had a look to see what I could cook for dinner... A few years ago we started having organic veg delivered from a company called Riverford, who are fab by the way!! So on this particular day we had received our box containing, among other things, broccoli.

I love broccoli, it's one of my favourite veg and have cooked it in many different ways, all good. After a quick scan through the index I found a recipe for a broccoli salad... I'd never tried broccoli salad before... I'd never even heard of it before! :-S  This instantly became the recipe for the night... Then having a quick scan through for something to serve with it I noticed "Killer Mac n Cheese." I love mac n cheese so this was a definite possibility! I had a quick scan through the ingredients and noticed it required *10 cloves of garlic*

!!!!!!!!!!!!!!!!!!!!!

Woo! Hoo! Now that's my kind of recipe!!!

This was definitely going to be cooked!!!!

Ok, calm down now :-)

So anyway, I cooked up a storm and this is what came out of the kitchen... I was missing the bacon for the broccoli salad, but other than that it was all good :-)


Why is it that photographs of food never seem to look as good as they do in real life? Unless you're a food photographer I guess...

The mac n cheese wasn't the best I've ever tasted, but it was very good. Nice garlic twist and some nice tomatoes, making it feel a bit healthier :-S The broccoli salad was gorgeous :-9 And one of my new favourite ways to serve this veg. The dressing is quite similar to a salad dressing that we make from the Wagamama Cook Book, which is also a favourite, needless to say there was no left overs at the end of the meal!

Happy Mothers Day.


For yesterday that is...

It's been so long since I did any paper crafting, like Christmas 2008! Oh actually just remembered I made a kind of scrapbook/birthday card for my Granddad in August 2009... But, it seems like so long ago!!! Since blogging some of my previous card attempts, it made me want to have another go. So I decided to have a go at making a card for Mom :-)

From a cluttered up and trying to keep the house tidy point of view, I feel I have too much craft stuff... yet when I go to make something I never have enough and struggle, trying to find new ways of using the same bits... I have loads of lovely papers, but hate to cut into them for card making, I can barely stand doing it for scrap booking... just want to keep them whole...

Anyway, the flower stamps I used were in the first set I bought. I also used them in the card I made for my nan here. The large flower stamp is also from the same set. I've also used them in scrapbook pages, that I'll get round to blogging about at some point! Come to think of it the diamonte things were in the set with the stamps too... It was a qvc today's special value from a few years ago... had a lot of good stuff in there :-)

It's such a simple design, but it took me sooooooo long to do!

I have no idea why, it was one of those days when the creative juices just weren't quite flowing in the right direction. I did the flowery paper quite quick and the letter tiles, but then took me forever to lay it out and come up with a way to finish it of. I toyed with the idea of leaves and flower round the border, adding butterflies and whatever else I can't remember now.

I like it, but still not happy with it... just kind of frustrated that whatever it was that I was trying to do, just wasn't quite meshing

This post is a bit jumbled too... Still channelling the card vibe I guess?


Tuesday 9 March 2010

Seema Beans :-9

Baked beans have always made a regular appearance in my diet. Growing up I always found them boring and only started to enjoy them when my Dad introduced me to the joys of beans on toast with cheese on top. Since then, I have struggled to eat them any other way.

That is until I met a lovely lady named Seema...

After giving birth to my son, Seema and our other lovely friend Jen frequently came to visit... obviously leading to the conundrum of what to eat for lunch. Together they introduced me to the delights of crisp sandwiches. I never admitted to them, till now, that I'd never had them before! Especially good with Quavers :-9 One day we also suddenly made a decision to make waffles and had to make an emergency trip to the corner shop for necessary ingredients...

Anyway, back to the beans...

One fateful day, we decided to have a more sensible meal of beans on toast. I'm not sure how it came about, but Seema mentioned that she never ate beans straight from the can at home and always added various things to spice them up a bit.

WOW! I don't know whether it's just me, but I'd never even thought about doing anything like that before (I know, I need to start thinking outside of the box!!)

I love trying new recipes and stuff so was more than intrigued to see what Seema meant... It is so simple I'm ashamed I never tried it myself in the past. We chopped up an onion and fried it with some dried chillies and some pepper... Not sure if she makes them the same at home, but at my house this is what we did.

I sat down to eat my beans, not sure if I would like them... there was no cheese!

One mouthful and I was sold... They tasted so good :-9

These days I have no problem eating beans without cheese... Now I have more of a problem eating them not Seema-fied.

Thank you Seema, Love ya!! xxx

Wednesday 3 March 2010

Mary Janes

So as I said before, when I found out I was pregnant with a girl I couldn't wait to get knitting cute girly projects. I love my son to bits, but you have to admit, girls are so much more fun fashionwise. You go into the clothes stores and like three quarters of the stock is for girls. To add insult to injury, the girls can even choose stuff from the boy's section... I guess truly liberal parents would let their son shop in the girls section, but it rarely happens.

Apart from the poncho in my previous post, I came across this pattern for a pair of Mary Jane Booties. Soooo cute!!!

With quite a bit of yarn still left over from the blanket I'd made/was making :-S I decided to put some to good use and have a go at knitting a pair.

I had to learn how to do the cable cast on method, as I'd never done that before, it came out a bit loose so I'll probably do it on smaller needles next time. Plus I found that the button hole was a bit too close to the end of the strap. If I ever make any more I think I'll try moving it in a stitch or two...

Other than that they turned out pretty well and took hardly any time to make :-)

Of course one lurked at the bottom of my knitting collection for quite some time waiting to be sewn up... Finally finished it in the car on the way to a local shopping centre after deciding she could wear them that day. Think I took the picture when we got home. Sorry about the poor photo quality... Artifical light, a wriggling new born and being too close to attempt the use of a flash, does not a good picture make :-S

Hmmmm, is it just me or has the spell check disappeared? Forgive any spelling mistakes until I find it :_(

Tuesday 2 March 2010

So cute :-)

When I found out our second child was going to be a little girl I couldn't wait to get knitting. I hit the net in search of free patterns and came across this one.

I fell in love with it as soon as I saw it and knew that I would really regret it if I didn't make it!It took awhile to get round to, but I finally took the plunge and ordered the yarn and needles.

The package arrived very quick and I was so excited, couldn't wait to get going on it. It is the first, and so far only, time I've worked with such a chunky yarn. It's good seeing your work growing so fast, I much prefer it to working with fine yarns like 4 ply.

The pattern also required me to crochet :-S

Seeing this I hit the net again (mainly YouTube) in search of tutorials... This led to more projects that I NEED to make in the future...

Having finally sussed the crochet part, I was able to complete the poncho. The best part is it's all knitted in a big circle, so the only bit I needed to join was the top of the hood! Whoop! I need more projects like this :-)

All finished...

And in time for our Christmas holiday to Paris.

Just finished and in need of a model, I grabbed baby sized Tigger and popped it on... Poor guy has been used to practice swaddling, by the midwife to demonstrate breastfeeding positions, to model new baby knits and probably other things he never counted on being used for.


Shoshone finally woke from her nap and was immediately plonked into model mode...

Here she is pulling off a classic catalogue pose, the "I wander what's going on over there?" Just need to work on the "checking your watch" and we're all set :-)

Monday 1 March 2010

3 years plus!

As in it took at least that long to complete.

I think it was my second knitting project. I started it while pregnant with Wiyot and completed it just in time for the birth of Shoshone :-S

It is made up of small garter stitch squares, which are then sewn together... it was the sewing that was the problem!

All but a few squares were knitted during my first pregnancy. I used to knit the squares on the bus on my way in to work...


And then began the sewing...

It took so long to join each square, probably because I didn't have much experience, so it took a lot of concentration, only to have to unpick at the end as the edges weren't coming together level. ARRRGH!

I'm still don't enjoy the joining process and usually have all the knitted components finished for some time before I get round to the sewing. You'd think it would be exciting as you finally get to see your work coming together to form a wearable garment.

Anyway...

Surprisingly, after giving birth to Wiyot I didn't get much time for knitting, let alone the sewing part. As he got older there seemed no point as he wouldn't need the blanket anyway!

When I found I was pregnant with Shoshone I realised I'd better get it finished! We aren't planning any more babies, so if she didn't get to use it all the hard work would be for nothing.

I didn't finish it all in one go. I kept coming back to it, sewing a few more squares here and there. My sewing skills must have improved as it took much less concentration and I could do it right first time round. After finishing it I decided it wasn't big enough and ended up adding a few rows at the bottom and sides... luckily I still had some left over yarn.

Well, it took ages but I love it! I took it to the hospital for when we bought Shoshone home and it's still the first blanket I choose when we're going out :-)

BTW, if anyone is wondering, the pattern is from Baby Knits for Beginners by Debbie Bliss

Monday 22 February 2010

Something a little different...

Yesterday we woke up to an unexpected snowfall. We didn't make any snowmen, but it made me think to blog about our previous snow friends.

This odd fella was our first creation, we made it when Shoshone was only a couple of weeks old... I didn't want to spend too long outside in the cold.

He was quite a funny looking thing and made us laugh when we looked out to see him... not sure what the extra ball on his head was about?!

This is our more recent creation. He was made on 2nd January, 2010 and lasted for quite a few weeks... except most of the time he was under another 5 inches of snow. He started off like any other snowman, until my little helper got board and started making snow angels and bombarding me with snowballs. At which point I got a bit carried away.

Answers on a postcard who its supposed to be...?